miércoles, 18 de diciembre de 2013

❀Eyebrow Shaping : Pluck the Perfect Eyebrows

Perfectly groomed eyebrows balance your features and frame your eyes. Read on for failproof tips on how to get them.


                                                                         Locate Your Starting Points


Flip your tweezer upside down so the open end is pointing downward, and place it vertically alongside the outer edge of the bottom of your nose. The point where the vertex lands marks the beginning of your brow (which should also be about one inch above the inner corner of your eye). Using an eye pencil, draw a vertical line to demarcate the start of each brow, then check that the space above the bridge of your nose is centered between them. Remove the strays that fall in between.


*Grab strands right at the root and slowly pull them out.
                                                 Remove the strays that fall in between.


                                                                                                                  Mark Your End Points


Lay the tweezer on an angle against your cheek so that the open end is at the bottom of your nose and the other end reaches the outer corner of your eye. The spot where the tweezer intersects your brow is where the hairs should end. Mark it with the eye pencil, then pluck the hairs beyond the line. 


Determine Your Brow Thickness

Starting just below the fullest part of your brow, use an eye pencil to draw a line along the bottom edge of your brow; it should be above any stray hairs and it should follow the natural shape of your brow's top line, which may be angled, slightly curved, or even straight. Pluck the strays below the line. Ultimately, your brows should be between a quarter inch and a half inch at their thickest.


 Shape Your Arch


Look straight into a mirror. The arch should peak above the outer rim of your iris and lie right on your brow bone: "Imagine upside-down check marks, but with soft angles," Mark the point with your eye pencil, then remove a row of hairs along the bottom, from your inner brow point to the peak point. After the peak, shape the tail.


"Make it a bit thinner than the main part of your brow, tapering at the end"Angela.


sábado, 14 de diciembre de 2013

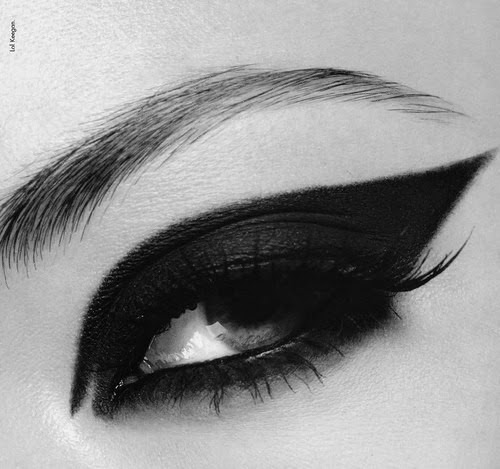
❀ Cat Eye Makeup and Smokey Cat Eyes


Try this sultry eyes makeup, suited both for day and evening looks. Learn to perfect this tricky style that brings instant glam to any eye shape and eye color!
Getting the sophisticated look of cat eye makeup can be tricky, but as long as you use the right products and experiment a little, you can pull off this stylish look that can be created with or without the smokey eye effect.


*Smoky Eye Makeup: Cat Eyes Essentials
The best tool for the cat eye makeup is the liquid eyeliner, which allows for the necessary precision much more than a pencil eyeliner. 


*How to Do Cat Eye Makeup for Day

For a more toned-down, but equally elegant cat eye makeup, start with the brush on the lashes at the inner corner of the eye. You should use small strokes at first and worry about thickening the line later. Stop at the end of your lashes then start the tail at the opposite ends and unite the two lines at the outer corner of your eye.

Follow the natural lash line and keep it relatively thin for a day look. Apply a dark eyeshadow on the top of your line and work towards the brow bone. 


*How to Do Cat Eye Makeup for Evening


The evening cat eye makeup look allows for more dramatic styles, but the essentials are the same. You can try using two or even three shades of eyeshadow, but blend them correctly to get the best look. Mascara on both the upper and lower eyelashes enhances this style of makeup.

If you're not getting the result you want by thickening the eyeliner flick, you can opt for a different technique for the perfect cat eye makeup. After drawing the thin line over your upper eyelashes, draw straight out following the angle of your lower lash line, stop at the most extreme point towards and your temple and bring back the eyeliner towards your lower eyelid. You can fill out the triangle at the end, once you've got the shape that works best for your eyes.


*TIPS. Don't overdo the mascara for cat eyes and keep lips with a matte finish in nude, pale pink or peach tones if you want to keep attention focused on your eyes. Use an eyeshadow primer or an oil-free foundation if you choose to keep a thinner line.


*For the most dramatic look, apply your pencil first, and then trace over the pencil with a matte black eyeshadow, applied damp. This will make the look very dark. Smudge if you want, but note the trend is a sharp line. To get, clean up your edges of the shadow by using a flat or angle brow brush to create a super sharp lined edge to your dramatic shadow look.


                    * Perfect Cat-Eye Liner ♥ Simple, Natural and glamorous appearance.Angela.


lunes, 23 de septiembre de 2013

❀Shaping Your Face According To Your Face Shape.


You have seen that makeup can do miracles. It is all about knowing how to do it. So today we will see the steps leading to the perfect makeup which will shape your face, showing the best parts of it and making the ones you don’t like less noticeable.
Before you begin, which is the funny part, you need to take your time and find out what kind of shape your face has. This is maybe the most important step because the whole process is based on it. So, there some basic types of face shape- heart, round, square and oval.


You have the HEART SHAPE  if you have a wider forehead and smaller chin. In this case your cheekbones will probably look bigger, so the first thing to do is to make them smaller using rouge. A very good trick to make your forehead look smaller is to put rouge or bronzing powder on its boundaries where your hair starts. When you combine these two steps, you will draw a frame on the top part of your face which is bigger and it will look thinner and smaller. You may also put lighter foundation or powder in the middle of your chin which will make it look more convex. The best colors for the lips are the delicate tones of pink and red.

THE ROUND SHAPE is characterized by forehead which is as wide as the lower face, and most probably big cheekbones. The main goal of your makeup is to create an “astir” form of your face. First you need to make your face look thinned using bronzing powder or rouge. Don’t be afraid to use a little bit more of it! Then to create even more relief, take some bright foundation and powder and put around your eyes and at the top of your cheekbones. Some other tips are: underlining you eyebrows- in order to create more shapes, using smoky makeup for your eyes.

THE SQUARE FACE SHAPE has angular chin and forehead. For those of you who have this shape, the best thing to begin with is to form a frame around your whole face. You must use the forehead tip for heart shape faces to make your features softer. The same thing is done with your chin in order to make it look rounder and thinner.  The best colors for you are the soft and sweet tones of pink. You must not use very aggressive makeup at all.

If you have the OVAL SHAPE your forehead and lower face are of the same width but your face is long. When it comes to rouge, the best way to put is in horizontal and the color is not of such importance. Ladies with oval face shape are free to experiment with their eye and lip makeup and can put a little bit more if they like it.


**The best rule about makeup you have to remember is that you must use a darker color on the parts of your face you to make look smaller and lighter on the parts you want to look bigger...Angela.


jueves, 19 de septiembre de 2013

❀ How to: Perfectly Shaped Eyebrows.


The secret to a perfectly shaped eyebrow can be summed up in 4 points… or rather 4 lines: the beginning, the highest point of the arch, the end and where it all comes together.

The inner edge of your brow should line up with the outside of your nose.
The highest point of your arch should be where the diagonal line extending from the outside of your nose to the outside of your pupil would hit.
The outer edge of your brow should taper off at the point where your eyebrow and the diagonal line from your nose to the outside corner of your eye would intersect.
The bottom of the inner and outer edges of your brow should line up horizontally.
But before you get  in front of that mirror,  to achieve amazing arches
You need this:

BRUSH: The brush is really the hero of beauty tools.  for separating eyelashes and removing mascara clumps, and you can also use it on your brows to brush the hair up.

SMALL SCISSORS: After you’ve brushed all the hairs in one direction, snip any strands that are noticeably longer than others. And always cut across the top of the brow, never down. 

BROW PENCIL: Before you begin to pluck, give yourself a guide. Fill in your brows with a brow pencil. One of my fav pencils is the L’Oréal Brow Shaping Pencil.

TWEEZERS: The most important tool is, of course, a sharp pair of tweezers. will allow you to pluck with precision just like the pros.

with these tips you can achieve shapely brows.!Angela.


❀ Hairstyles & Makeup


Now is time of make a great combination. Beautiful Braids, HairStyles & Beautiful Make up.


I think you are now an expert doing a braid with the above steps.
Now in the next blogs I will show you different tips about Makeup,  Hair,  Nails,  Skin Care,  Style ..Angela


viernes, 12 de julio de 2013

❀ Waterfall Braid

A French braid with strands left out, the waterfall is a romantic favorite. Also known as a cascade braid, this look has a hippie vibe to it, but the whimsical style (which works best on Beauties with longer hair) would be the perfect choice for a relaxed, outdoor wedding.


You do like this hairstyle?, I love how versatile it is, how it works equally well for parties and the everyday.


You can curl the rest of your hair which is left down using your hair straighteners or curling tongs to add more texture … I think this would look super cute for a night hairstyle..Angela


miércoles, 10 de julio de 2013

❀ Fishtail Braid

Fishtails (sometimes called fishbone) braids don't only have to be ponytails. You can put a fishtail braid anywhere that you would put a traditional three-stand braid.
Fishtail braids are excellent, quick styles for women with longer natural hair, or even braids extensions. Check out the tutorial below to see how it is done.


you like?
it's actually really fun and easy to do! 
and they look great and go with just about any casual style. 


Fishtail braids can be sported in a number of ways, loose or tight, in a chic   loose or a cute braided tail. Personally  I like the messier fishtail braid is, the more gorgeous and lovely it will look..Angela


martes, 9 de julio de 2013

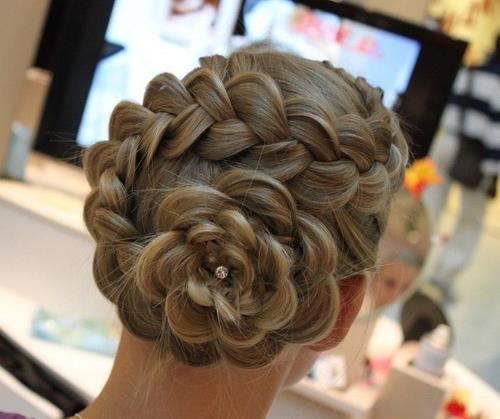
❀ Conch Shell Braid

Inspired by shapes of a conch shell, this underwater wonder is created by plaiting multiple braids and then twisting them together into a braided bun.
This complicated hairstyle should be done with a lot of patience, since it is hard to keep the hairdo neat.
it might be stunning for a wedding or debutante ball, especially if you wanted to show off your shoulders and neck.


Don’t worry, it only looks a little complicated, but  if you’re pretty good with a normal braid sure sure get a beautiful result..Angela


lunes, 8 de julio de 2013

❀Mermaid Braid


The mermaid braid is a really cool braid! I hope they like this one too!Its a perfect braid for school and for going out, not that hard to do.   Its an combination of a plaited crown and a loose classic French braid...  this look will require more practice than most, but when you make it, you’ll feel like an princess.


Super pretty - don’t you think?


Want to be a charming mermaid too? Although getting a natural mermaid tail may seem something impossible, you can always recreate the glamorous look of this lovely creature by styling her chic hairstyle – absolutely adorable mermaid braids.. Angela


domingo, 7 de julio de 2013

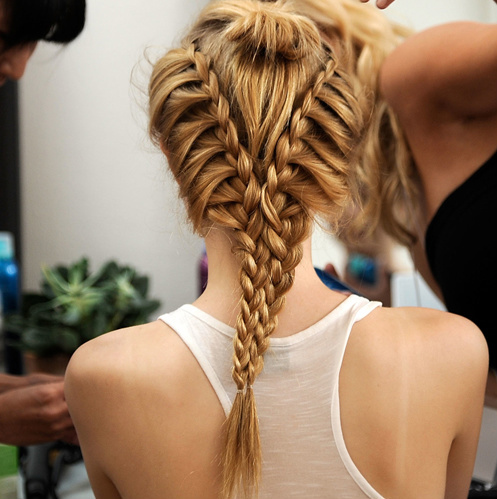
❀ Multistrand Braid

You can play with several simple braids, making two, three or four ... then join all, making one. let your imagination run wild.


The number of strands used in multi-strand braid hairstyle ranges from five to nine, whether you construct a braid it will seem as if you have extra thick, and you getting phenomenal braiding skills!..Angela