miércoles, 26 de marzo de 2014

❀ Alimentos para la Piel.

Existen alimentos beneficiosos para la piel? La respuesta es sí, aunque no pienses que por comer más o menos de esto y aquello tu piel cambiará de forma milagrosa. Lo que sí es cierto es que mejorando tu alimentación, tu piel lo reflejará en consecuencia. Te cuento cuáles son los mejores  alimentos para nuestro cutis, llevando una alimentación equilibrada conseguiremos que se refleje en el estado de nuestra piel. 


Conoce qué alimentos dejan tu piel tonificada y la protegen de agente externos:


                                        ACEITE DE OLIVA


Tu piel necesita ácidos grasos y vitamina E para regenerarse y estar protegida. Por ello, el aceite de oliva es uno de los mejores alimentos para la piel, así que no te olvides de incorporarlo a tu dieta. Eso sí, no quiere decir que debas bañar tu comida en este aceite, simplemente que no dejes de consumirlo en cantidades normales (unas 3-4 cucharadas al día).


HUEVOS
Contienen mucho azufre, un mineral imprescindible para sintetizar la queratina. Es decir, ¡que beneficiará al estado de tu pelo! Tiene acción anti-grasa, que también abunda en la leche y sus derivados, así como en los cereales integrales.


LAS FRUTAS
La piel necesita vitamina C y antioxidantes para protegerse de los agentes externos y evitar el envejecimiento prematuro. Los cítricos como la naranja, el limón y el pomelo no deben faltar en tu dieta diaria.


LOS BETACAROTENOS
Los betacarotenos se transforman en vitamina A en nuestro organismo, con una importante acción antioxidante. Están en las zanahorias, la calabaza y en las verduras de hoja verde como las espinacas o la lechuga.


LAS ALMENDRAS
Como otros frutos secos (también las avellanas, nueces o pistachos), reducen la oxidación celularpor su alto contenido en vitamina E. Aportan ácidos grasos que, además, dan flexibilidad y previenen las manchas en la piel y el envejecimiento.


LAS FRAMBUESAS
Tienen una gran concentración de vitamina E y muy pocas calorías. Esta vitamina aporta luminosidad al rostro.


EL PLATANO
Fuente de zinc, un elemento altamente antioxidante. Esta fruta no sólo favorece la renovación celular sino que, además, aporta tono a la piel.


EL AGUACATE
Esta fruta es uno de los mejores alimentos para la piel ya que contiene una alta concentración devitaminas C y E, imprescindibles como antioxidantes para prevenir el envejecimiento prematuro. Además, también es fuente de Omega 3, otro ácido graso esencial que mejora la calidad de la piel.


Y LO QUE NO PUEDE FALTAR EL AGUA
No es un alimento, es incolora, inodora e insípida, pero resulta esencial para la salud de la piel. Los dos litros al día no sólo son necesarios para calmar tu sed, sino que también te hidratan. De hecho, la deshidratación interna también se nota en la piel, que se ve seca y acartonada. Además, te ayuda a eliminar toxinas que, por cierto, también se reflejan en tu rostro con el tono apagado y la presencia de ojeras.


En general, lo imprescindible es comer sano, de forma saludable, aportando a tu organismo todos los nutrientes necesarios; y algunos de estos alimentos son buenos para la piel especialmente. Eso sí, ¡debes comerlos de forma continua!Angela.


viernes, 14 de febrero de 2014

❀ 20 Makeup Tricks You Would Wish You Knew Before !


                                            1. Full Coverage with Cream Foundation


There’s always a coverage problem with cream foundations. They give you more of a transparent coverage and then the concealer stands out. So, next time if you want medium to full coverage with a cream foundation, mix it with primer, and then apply and see the change for yourself.


2. Cream Foundation for Oily Skin

You’ve always been told not to use cream foundation on oily skin, but here’s a way with which you can. Use a sponge to spread the foundation on your skin. Mostly all foundations have oil formulation, so when you use the damp sponge, it takes up the pigment but not the oil, giving you a matte oil-free finish.


3. Youthful Blush

Usually we apply blush to highlight the cheekbones, but the blush has more to do with face contouring. Next time, try to apply your blush in a way that it’s faded on the apples and darker on the hairline. I know you are happy with this technique.


4. The Ring Finger Wonders

The other day I hear a makeup artist, that  always better to apply makeup with ring finger. The ring finger is the weakest, and so it’s not too hard on the skin to create wrinkles and break the layer of makeup. Especially, when you are putting foundation/ concealer under your eye (the wrinkle friendly area), the ring finger will give you the best finish.


5. Deodorant not only for Fragrance

When you are in a party surrounded by so many people. Here’s the trick, spray some deodorant on your finger and dab it on your T-zone, under eyes or any oily patch on your skin. It will reduce oil and sweat and secure your makeup.


6. Enviable Lashes

Sure your mascara is not more than a month old. Twist the mascara at the roots of your lashes and sweep upwards out. The trick is to keep the base thick and let the lashes taper naturally.


7. Fix Broken Makeup 

It's heartbreaking to see your expensive Makeup broken? You can never be too careful about it after all. here’s a trick to fix broken makeup, and save money. Just add a few drops of alcohol in your broken powder, you’ll see the alcohol seep in and the powder becomes soft. Use your finger to smoothen the paste and spread it in the case. If you like finishing, you can give it a neat finish.


8. Bright Sparkly Eyes

Dark circles make you look tired and dull. It’s very important to do the under eye makeup carefully. Here’s a tip from Bobbi Brown on how to get a wide awake look. Before applying makeup, prepare the area with a fast absorbing under eye cream, so that the product glides smoothly and your eyes stay protected. Use a concealer that is 2 shades lighter to your foundation and follow with a pale yellow powder to avoid creasing, and you will be bright-eyed maiden!


9.  Effect Without the Mascara

You don’t always need mascara to flaunt thick long lashes. Here’s how to create the same look with only eye liner. Line the upper rim of your eye with the liner, Not over the lashes just a tight line and also in between the lash roots. This will create the illusion of thick lashes without the mascara.


10. The complicated: Waterproof Makeup 

We all love waterproof makeup, but waterproof mascara is such a pain when it comes to removing it. I end up losing some of my lashes along, every time. So, first apply normal non waterproof mascara and finish it with a coat of the waterproof one. Now, is easy to remove your mascara without any special makeup removers.


11. Pretty Finish of Lipsticks

How we love the colorful kissable lips, so here’s what you do for a smooth finish. Scrub your lips with your toothbrush or a damp towel, and remove the dead skin before coating them with lipstick. Now, the lipstick will glide smoothly without forming any lumps.


12. Fuller Lips Effect

Once you are done with the lipstick and gloss, dab a little silver or golden lip-gloss in the middle of your lower lip. Also, put a little lip balm  (the area below your nose and over your lip) to give it a little shine. Shine on that area creates the illusion of fuller lips.


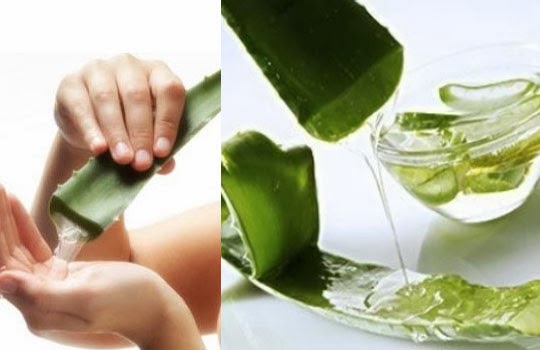
13.  Aloe Vera Primer

In addition to soothing and eradicating any skin and scalp problems, the benefits of Aloe Vera for Hair as a a great conditioning agent is excitingly overwhelming. The gel-like substance of the aloe barbadensis leaf gives it a similar chemical composition of keratin, the naturally occurring protein in hair cells.


14.  Smaller Forehead

Large foreheads are capable of stealing attention from the rest of your face. If you have bangs then you already know how to hide it, if not, here’s what you can do. Take bronzer (the matte one,) then, apply it in circular motion to blend properly. Bronzer creates a shadowy look that would make a large area appear tinier. I using this trick a lot!


15.  Slimmer Sharper Nose

Make a smaller nose with the help of this simple tip. Spread foundation as you would normally do and then swipe a streak of highlighter downwards in the centre of your nose,  Make sure you do it in a straight line. The highlighted skin, sandwiched between the normal tones, will create the illusion of a sharp and slim nose.


16. Lipstick and Concealer

Just a little bit of coral or peach lipstick mixed with your concealer can give you refreshed eyes in a minute. Using plain concealer sometimes give you a fake pale color under the eyes, which makes it very obvious that you are wearing makeup. If you add just a  color, it gives the concealer a very natural look and also brightens up your eyes instantly.


17. Dots to Perfection

The people of the makeup world call it as- stippling. Stippling is, using your foundation by shading with dots, instead of strokes. So next time, when you apply your foundation, use the dots method for a more natural finish. You can also use it for applying blush.


18.  Foundation vs. Tinted Moisturizer

Tinted moisturizers are making it big in the makeup world. Tinted moisturizers tend to moisturize your skin and also give a little color. When you want the natural tinted moisturizer look, mix some moisturizer in your foundation and blend it properly before applying. This will give you a translucent layer, which looks as natural as naked skin, but also hides open pores and minor imperfections.


19. The Natural Makeup Remover

When you don’t have a makeup remover, you can just dab some olive oil in cotton, and run it over your eyes and lips. This will not only remove your makeup properly, but also leave your skin nourished. Olive oil is just great for eyes and lips. In fact, if you like about eye creams, just dab a little olive oil under and around your eyes, before you go to sleep. And, one more little secret, it will also help you grow your lashes longer and thicker!


20. Instant Removal

Don’t you just hate it when a notorious irritating pimple/ zit come out on an important day? Here’s what you can do to get rid of it almost instantly. You will need an Aspirin, remember, no other pain relievers, just 100 per cent Aspirin. Mix it in some water. It will dissolve and make a paste. Now take a few and apply the paste on the zit. Hold it for 10-15 minutes and then wipe with a clean wet tissue, If it doesn’t remove the zit completely, it’ll at least shrink it and remove the redness.
*Don’t do it, if you are allergic to Aspirin.


Share these tips.Angela.*


miércoles, 18 de diciembre de 2013

❀Eyebrow Shaping : Pluck the Perfect Eyebrows

Perfectly groomed eyebrows balance your features and frame your eyes. Read on for failproof tips on how to get them.


                                                                         Locate Your Starting Points


Flip your tweezer upside down so the open end is pointing downward, and place it vertically alongside the outer edge of the bottom of your nose. The point where the vertex lands marks the beginning of your brow (which should also be about one inch above the inner corner of your eye). Using an eye pencil, draw a vertical line to demarcate the start of each brow, then check that the space above the bridge of your nose is centered between them. Remove the strays that fall in between.


*Grab strands right at the root and slowly pull them out.
                                                 Remove the strays that fall in between.


                                                                                                                  Mark Your End Points


Lay the tweezer on an angle against your cheek so that the open end is at the bottom of your nose and the other end reaches the outer corner of your eye. The spot where the tweezer intersects your brow is where the hairs should end. Mark it with the eye pencil, then pluck the hairs beyond the line. 


Determine Your Brow Thickness

Starting just below the fullest part of your brow, use an eye pencil to draw a line along the bottom edge of your brow; it should be above any stray hairs and it should follow the natural shape of your brow's top line, which may be angled, slightly curved, or even straight. Pluck the strays below the line. Ultimately, your brows should be between a quarter inch and a half inch at their thickest.


 Shape Your Arch


Look straight into a mirror. The arch should peak above the outer rim of your iris and lie right on your brow bone: "Imagine upside-down check marks, but with soft angles," Mark the point with your eye pencil, then remove a row of hairs along the bottom, from your inner brow point to the peak point. After the peak, shape the tail.


"Make it a bit thinner than the main part of your brow, tapering at the end"Angela.


sábado, 14 de diciembre de 2013

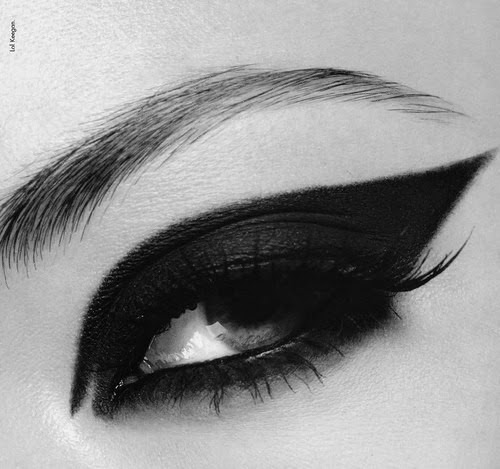
❀ Cat Eye Makeup and Smokey Cat Eyes


Try this sultry eyes makeup, suited both for day and evening looks. Learn to perfect this tricky style that brings instant glam to any eye shape and eye color!
Getting the sophisticated look of cat eye makeup can be tricky, but as long as you use the right products and experiment a little, you can pull off this stylish look that can be created with or without the smokey eye effect.


*Smoky Eye Makeup: Cat Eyes Essentials
The best tool for the cat eye makeup is the liquid eyeliner, which allows for the necessary precision much more than a pencil eyeliner. 


*How to Do Cat Eye Makeup for Day

For a more toned-down, but equally elegant cat eye makeup, start with the brush on the lashes at the inner corner of the eye. You should use small strokes at first and worry about thickening the line later. Stop at the end of your lashes then start the tail at the opposite ends and unite the two lines at the outer corner of your eye.

Follow the natural lash line and keep it relatively thin for a day look. Apply a dark eyeshadow on the top of your line and work towards the brow bone. 


*How to Do Cat Eye Makeup for Evening


The evening cat eye makeup look allows for more dramatic styles, but the essentials are the same. You can try using two or even three shades of eyeshadow, but blend them correctly to get the best look. Mascara on both the upper and lower eyelashes enhances this style of makeup.

If you're not getting the result you want by thickening the eyeliner flick, you can opt for a different technique for the perfect cat eye makeup. After drawing the thin line over your upper eyelashes, draw straight out following the angle of your lower lash line, stop at the most extreme point towards and your temple and bring back the eyeliner towards your lower eyelid. You can fill out the triangle at the end, once you've got the shape that works best for your eyes.


*TIPS. Don't overdo the mascara for cat eyes and keep lips with a matte finish in nude, pale pink or peach tones if you want to keep attention focused on your eyes. Use an eyeshadow primer or an oil-free foundation if you choose to keep a thinner line.


*For the most dramatic look, apply your pencil first, and then trace over the pencil with a matte black eyeshadow, applied damp. This will make the look very dark. Smudge if you want, but note the trend is a sharp line. To get, clean up your edges of the shadow by using a flat or angle brow brush to create a super sharp lined edge to your dramatic shadow look.


                    * Perfect Cat-Eye Liner ♥ Simple, Natural and glamorous appearance.Angela.


lunes, 23 de septiembre de 2013

❀Shaping Your Face According To Your Face Shape.


You have seen that makeup can do miracles. It is all about knowing how to do it. So today we will see the steps leading to the perfect makeup which will shape your face, showing the best parts of it and making the ones you don’t like less noticeable.
Before you begin, which is the funny part, you need to take your time and find out what kind of shape your face has. This is maybe the most important step because the whole process is based on it. So, there some basic types of face shape- heart, round, square and oval.


You have the HEART SHAPE  if you have a wider forehead and smaller chin. In this case your cheekbones will probably look bigger, so the first thing to do is to make them smaller using rouge. A very good trick to make your forehead look smaller is to put rouge or bronzing powder on its boundaries where your hair starts. When you combine these two steps, you will draw a frame on the top part of your face which is bigger and it will look thinner and smaller. You may also put lighter foundation or powder in the middle of your chin which will make it look more convex. The best colors for the lips are the delicate tones of pink and red.

THE ROUND SHAPE is characterized by forehead which is as wide as the lower face, and most probably big cheekbones. The main goal of your makeup is to create an “astir” form of your face. First you need to make your face look thinned using bronzing powder or rouge. Don’t be afraid to use a little bit more of it! Then to create even more relief, take some bright foundation and powder and put around your eyes and at the top of your cheekbones. Some other tips are: underlining you eyebrows- in order to create more shapes, using smoky makeup for your eyes.

THE SQUARE FACE SHAPE has angular chin and forehead. For those of you who have this shape, the best thing to begin with is to form a frame around your whole face. You must use the forehead tip for heart shape faces to make your features softer. The same thing is done with your chin in order to make it look rounder and thinner.  The best colors for you are the soft and sweet tones of pink. You must not use very aggressive makeup at all.

If you have the OVAL SHAPE your forehead and lower face are of the same width but your face is long. When it comes to rouge, the best way to put is in horizontal and the color is not of such importance. Ladies with oval face shape are free to experiment with their eye and lip makeup and can put a little bit more if they like it.


**The best rule about makeup you have to remember is that you must use a darker color on the parts of your face you to make look smaller and lighter on the parts you want to look bigger...Angela.


jueves, 19 de septiembre de 2013

❀ How to: Perfectly Shaped Eyebrows.


The secret to a perfectly shaped eyebrow can be summed up in 4 points… or rather 4 lines: the beginning, the highest point of the arch, the end and where it all comes together.

The inner edge of your brow should line up with the outside of your nose.
The highest point of your arch should be where the diagonal line extending from the outside of your nose to the outside of your pupil would hit.
The outer edge of your brow should taper off at the point where your eyebrow and the diagonal line from your nose to the outside corner of your eye would intersect.
The bottom of the inner and outer edges of your brow should line up horizontally.
But before you get  in front of that mirror,  to achieve amazing arches
You need this:

BRUSH: The brush is really the hero of beauty tools.  for separating eyelashes and removing mascara clumps, and you can also use it on your brows to brush the hair up.

SMALL SCISSORS: After you’ve brushed all the hairs in one direction, snip any strands that are noticeably longer than others. And always cut across the top of the brow, never down. 

BROW PENCIL: Before you begin to pluck, give yourself a guide. Fill in your brows with a brow pencil. One of my fav pencils is the L’Oréal Brow Shaping Pencil.

TWEEZERS: The most important tool is, of course, a sharp pair of tweezers. will allow you to pluck with precision just like the pros.

with these tips you can achieve shapely brows.!Angela.